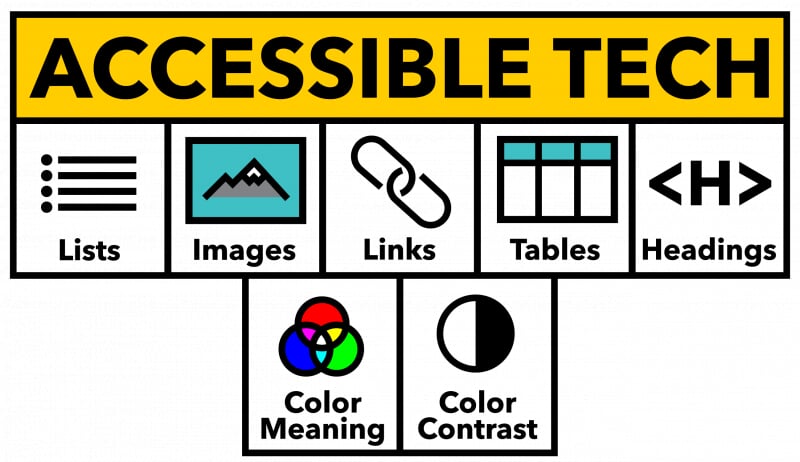
Headings
Introduction
Headings are used to organize and provide structure to documents. While sighted users can scan a page for large or bold text to identify headings, blind or low-vision users who rely on screen readers miss these visual cues. Avoid using text size or emphasis (bold, underline, italic) as the sole means of identifying a heading. Using heading styles in your Canvas content pages and documents provides important semantic structure that screen readers users can access. Headings also support document navigation and form the basis of the document table of contents in editors like Microsoft Word and Google Docs.
Assign headings based on their hierarchy in the document. The main title or description of the document should be assigned Heading 1 (H1). There should only be one Heading 1 element in your document. In Canvas the Heading 1 element is reserved for the title of the content page. Sub-headings of equal importance should follow as Heading 2. These can be thought of as the main sections of the document. Headings at level 3 would immediately follow a Heading 2 element. Any further sub-headings should continue this pattern (Heading 4, etc.). Never skip a heading level (e.g., don’t go directly from a Heading 1 to a Heading 3).
Best practices for using headings to provide well-structured Canvas content pages and documents to support all users, including those who use asssitive technology:
- H1: Title of the document (reserved for page title in Canvas)
- H2: Primary sections of the document
- H3: Subsections of each primary section
- H4: Sub-subsections of each subsection
- And so on for H5, etc.
Resources
- Word and PowerPoint Accessibility Evaluation Guide (WebAIM resource)
Using Headings in Canvas
When you create a new content page in Canvas the title will automatically be assigned as the Heading 1 element. You can add headings beginning at level 2 within the paragraph menu of the rich content editor (RCE). Three levels of headings are available as well as regular paragraph and pre-formatted text. First select the text then assign the desired heading from the menu (see below).
Using Headings in Microsoft Office
Word
Adding headings in Word documents is accomplished by accessing the styles ribbon on Home tab (see below).

To add a heading:
- Select the heading text
- Click the required heading in the Styles ribbon
If you don't like apearance of the default heading style you can right-click the style and choose the "Update to match selection" option (see below).

PowerPoint
Powerpoint automatically assigns the Title element of a PowerPoint slide as Heading 1. Each slide in your presentation should have a title. If possible use an accessible PowerPoint template with title element included.
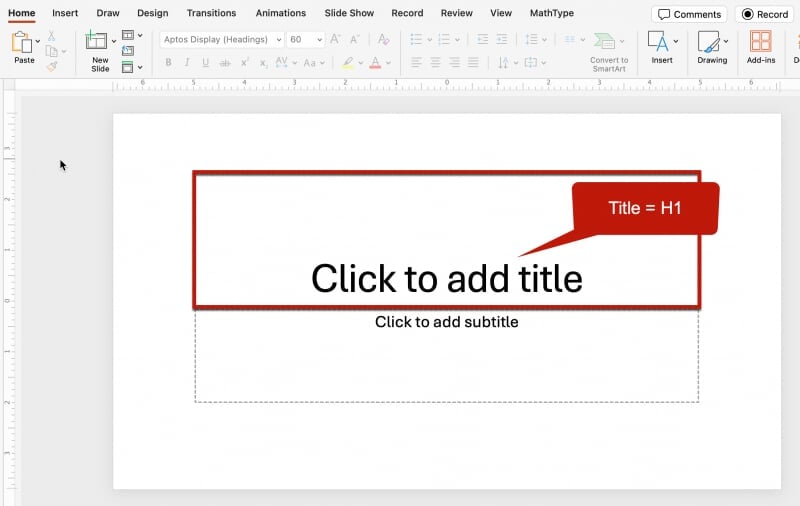
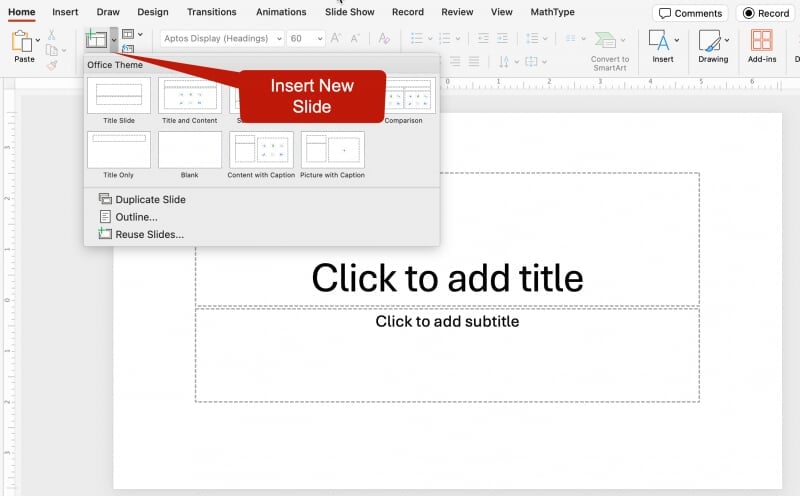
You can also use the New Slide option in the PowerPoint Home ribbon to add a slide with a title element. Title elements in slides will be tagged as an H1 (first slide) or H2 (additional slides) if you export to PDF.
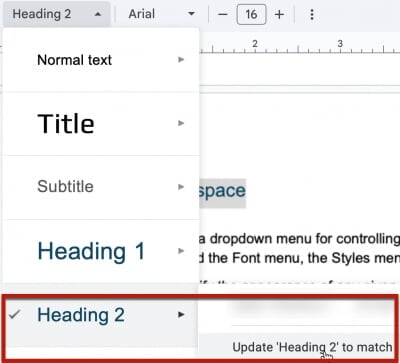
Using Headings in Google Docs
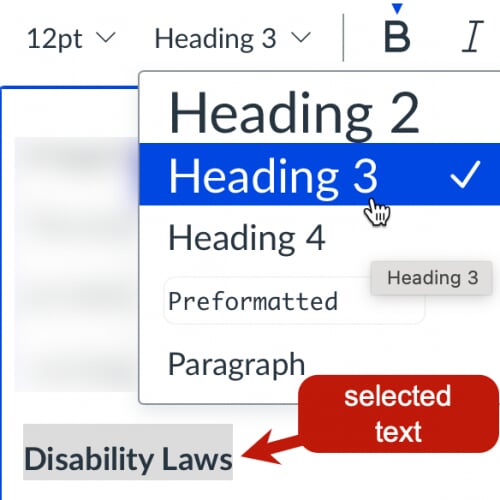
Adding headings in Google documents is accomplished by accessing the styles menu which is located between the Zoom menu and the Font menu in the toolbar (see below).
![]()
To add a heading:
- Select the heading text
- Click the required heading in the Styles menu
If you don't like apearance of the default heading style you can access the right facing arrow for the appropriate heading level and choose the "Update to match" option (see below).
Once you have your styles set up the way you want them, the “Options” selection feom the style menu will allow you to save these as your defaults, or to reset them to your default options if you have already created settings you prefer.